Who Am I
I am Jacobo Galofre, student of the Bachelor’s Degree in Video Games by UPC at CITM . This content is generated for the second year’s subject Project 2, under supervision of lecturer Ricard Pillosu.
Sprite Ordering and Camera Culling
In this website you will find information about how to create Sprite Ordering and Camera Culling effects for 2.5D game. You can also visit the main github repository page where you will be able to find 2 Visual Studio projects, 1 With the Camera Culling and Sprite Ordering systems fully implemented and another one with some parts missing to help you practice.
Sprite Ordering
What is Sprite Ordering?
When we are talking about rendering sprites for a game, we know that the compiler will have to render the images in a certain order, as it can’t render everything at the same time. This causes that if 2 sprites overlaps each other maybe the compiler will render it in the opposite order we want it to work, making the image that is supposed to be at the back be in front of the other one. To solve that we can manually code which of the sprites we want to render first or we can also make use of different automatic Sprite Ordering systems that help us choose which sprite must be on top.
Why is Sprite Ordering Important?
When making a 2.5D game, for example, we need to create the feeling that the game has depth when it’s acutally a 2D game, to do that we have to play with the prespective and the enviroment, so if for example, the player goes behind a tree in the map, we dont want to print the player on top of the tree we will want to print player first and the tree afterwards so the the tree sprite gets to be on top of the player sprite.
Doing it manually is a really easy option if you have few sprites that you are going to print but when in a game there are dozens of entities that we need to print, it becomes a nearly impossible task to do by hand, and that’s where automatic sprite ordering systems help us.
zelda 2.5D game:
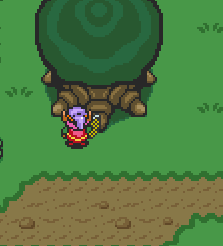
in front of a tree
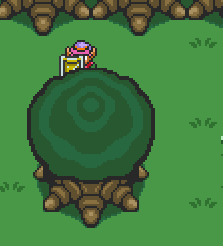
behind a tree
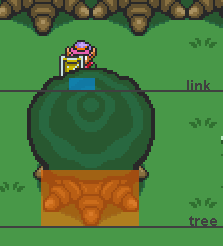
Y axis difference
How do we control the sprite ordering automaticlly in c++?
There are many ways of controlling sprite ordering, but we are going to talk about one of the simplest ways of doing so. First of all we need to think about our game as a 3D game instead of a 2D game, with x,y and z axis. X and y axis will be easy to control because the sprites have width and height, the one that we want to focus on is the Z axis.
To control z axis what we are going to do is to give sprites a new variable which will control how deep compared to other sprites is the image. After that we will have to sort our sprites, so we can get them in order and once we have all of the sprites that we need to render in order we will send them to render in that specific order.
let’s get more technical:
To do that we will be using the standard template library, which is going to let us use the priority_queue. A priority queue is an abstract data type really similar to a normal queue with the small difference that each elements inside of it has a certain priority. That means that the data that we insert inside the priority queue will be ordered from least to greatest according to the priority we gave each element.
The priority_queue will need 3 parameters:
1. Type of elements in the queue.
2. Type of container to store the data.
3. A binary predicate that takes two elements (of type T) as arguments and returns a bool.
the syntaxis will look something like that:
std::priority_queue <class T, class Container = vector<T>, class Compare = less<typename Container::value_type> > name;
Before implementing our priority queue we will have to create a class that will be the elements with all the data that we are going to print and a struct with a boolean opperator that will compare 2 elements form the class that we previously created and will return true or false according to our priority condition.
After doing that we will be able to implement the priority_queue with our 3 parameters:
1. The class that we created.
2. A vector of the class that we created.
3. The struct that we created with the boolean opperator.
With that we will be able to order our sprites, the only thing that is left to do is to create 2 functions. The first function will have to create an element of the class we created and and push it into the priority queue. The second function will be the one that will take the elements that are in the queue in the correct order, send them to the renderer and pop them form the queue.
After that is done we will have our sprite ordering system.
Results
Now we should be able to see our sprites rendered as we wanted.
Useful Links
Sprites sorting: maths for Isometric view
Camera Culling
What is Camera Culling?
Camera Culling is a technique used by game developers to optimize their games. Normally when we create a game for the first time we try to render everything in the level, map, arena, etc even though these there is stuff outside the camera, and that the player is not able to see.
What camera culling does is that reduces what we render only to the things we can see in the camera, and the stuff that it’s not visible for the user doesn`t get rendered.
Why is Camera Culling Important?
As we mentioned before, Camera Culling is a way to optimize the game, by using this technique we are going to be able to increase the performance of our game as we are going to be loading less sprites and entities each cycle.
How do we create a camera culling effect in our game?
To create a camera culling effect in our game is pretty simple, we must have to select what we want to render. To do that we are just going to add a filter to our rendering system, this filter will check if something is outside the camera or not and once it has determined if its inside the camera or not, it will be rendered or not.
In order to do that we will have to implement a filter similar to the next one and apply it to the render function or the function that pushes the elements into the priority queue if you have done the sprite ordering system before:
if ((rect.x < -camera.x + camera.w && rect.x + rect.w > -camera.x) || (rect.x < -camera.x + camera.w  && rect.x + rect.w > -camera.x))
	{
		if (rect.y < -camera.y + camera.h && rect.y + rect.h > -camera.y)
		{
      //render
		}
	}
else
{
//dont render
}
Once we have done that we will have our camera culling system implemented, the problem is that at this point it’s not going to be really efficient because we are going to be checking if every element on the map is inside of the camera and if we have 1000 entities in the map, our game will have to do a lot of work.
In order to reduce that amount of operations we can implement something called space partitioning. Space partitioning is a tecnique based on the idea of dividing the space in small cells so then we can check only the entities that are in the same cell. In order to divide the cells into smaller pieces we will have to create a class called quadtree. Quadtrees are a type of space partitioning that will allow us to divide the space in 4 smaller fragments of equal parts in order to divide the space into even smaller pieces, this way we won’t have the problem of having many entities in the smae quadtree if those are close enough because the quadtree will divide the space ins smaller cells to separate the entities.

Quadtree ramifications represented
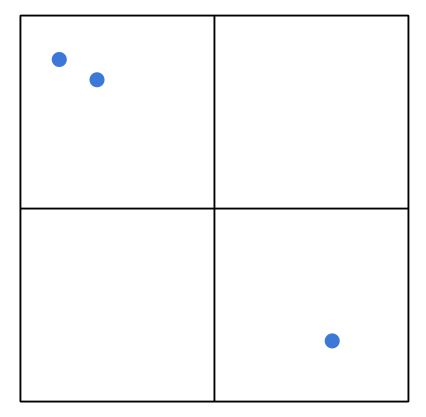
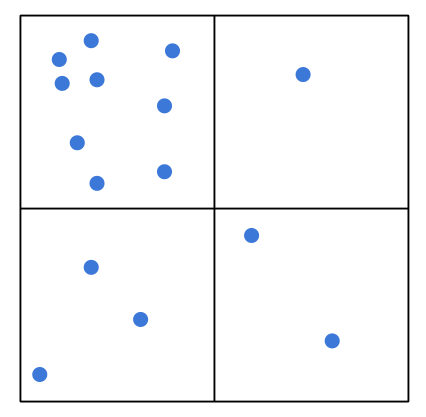
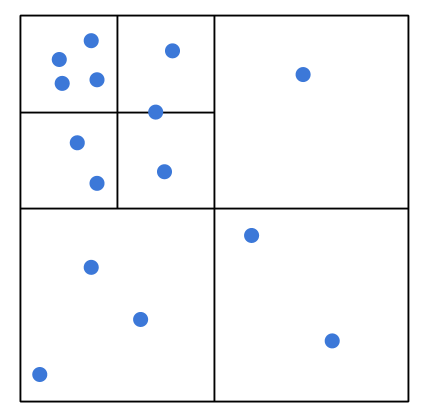

Quadtree visual representation
Inside the quadtree we will need 5 functions:
Clear(): This function deletes all the elements inside the nodes.
Split(): This functions is in charge of dividing the actual node into 4 nodes when the actual node has reached it’s maximum number of elements.
Insert(): This function inserts every element in it’s corresponding node.
PushCollisionVector: This function checks which elements the will have to be checked according to the element passed.
IfInside() Checks if a rectangle is inside another one.
Once we have the quadtree class we can start to implement it in the camera culling, to do so, we have to Initialize a quadtree with a rect of the size of the map or the are where we want to aply it. Then we have to insert all the entities and finally call the pushcollisionvector with the camera rectangle. This way, it will check which elements are inside the camera and it will return them in a list, and that list will be the elements that will have to be printed.
Results
Now we should be able to only render things inside the camera in an efficent way.
Useful links
Spatial partition: In this video you will find a visual representation of how spatial partitioning works.
Quadtree Demo: In this website you will be able to play around with a representation of a quadtree.
Webgraphy
Sprite Ordering
Depth sorting for game maker studio
StackOverflow ddiscussion with sprite ordering idea
Video: priority_queue explanation
Camera Culling
Spatial partition and quadtree idea
Quadtree explanation and images